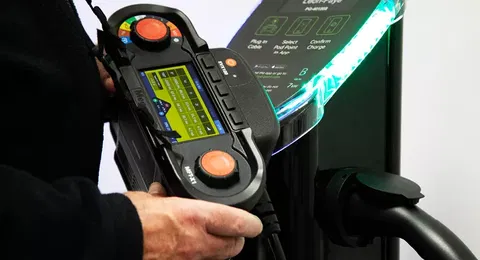
Testing EV charge points shouldn’t be complicated — but it often is. A practical approach using the EVX100 and MFT-X1.

RCD trips. CP states get missed. Chargers won’t reset. And suddenly you’re wasting time walking back and forth to the board.
This blog looks at a more practical approach using the EVX100 charge point adaptor and MFT-X1 multifunction tester, as used on site by James Cripps of J.C. Electrical — with no prior training, just the gear and the job.
Straightforward setup — no mess of leads
With the EVX100, there's no manual dial, no second unit, and no trailing cables. It connects directly to the MFT-X1 and plugs into the charger via a single Type 2 lead.
“What stands out to me the most is the simplicity of it. It’s just one piece of cable — no leads hanging everywhere. It plugs straight into the machine, and it’s easy to use. You don’t have to muck around changing settings. You just plug in, choose RCD or Zs, press go. For someone doing this every day, that’s going to speed it up no end.” — James Cripps, J.C. Electrical
Once powered, the MFT-X1 detects the EVX100 and unlocks the EV menu. The CP state sequence (A > B > C) runs automatically — no fiddling with rotary knobs or toggles.
Visual checks, connection, and charger behaviour
Before running any tests, you'll still do your standard visual checks: cable routes, isolator position, socket labelling, and earthing.
When you plug in, the LED on the EVX100 flashes yellow — wait until that stops before testing. Some chargers might require a short delay or manual “Start charging” button before switching to State C2.
You’ll see real-time feedback on screen — including CP state, voltages, and, on three-phase installs, phase rotation.
Running your tests — without the back-and-forth
With the EVX100 and MFT-X1, most test actions happen from one interface. That includes:
Loop impedance (L-PE, L-N, L-L) with appropriate 2- or 3-wire options
Insulation resistance and voltage drop
RCD or RDC-DD testing with EV-specific sequences
PE fault detection and CP error simulation
When an RCD or RDC trips, the EVX100 automatically runs a reset sequence (C > B > A > B > C) until the charger returns to normal. No walking back to the DB. No manual cycling.
What to watch out for
Charger not responding? Some take time to initialise — others need a manual “start charge” button pressed first
PE error before test? That’s a safety lock — if detected, testing will pause automatically
Which protection type? Choose EV A/RDC if using a 6 mA RDC-DD + Type A RCD, or EV A/B if testing a Type B RCD alone
Capture results and move on
All results sync directly to CertSuite, cutting down paperwork. Bluetooth transfer is quick, and your certification is already half-done by the time you're packing up.
Want the full guide?
The downloadable PDF includes:
Test flow and screen examples
CP state behaviour
RCD and RDC testing
PE error handling
Reset advice for tricky chargers
Keep it on your phone or van folder for quick reference on site.
