
The Dimplex Opti-myst range features a realistic 3D electric flame and smoke effect. Here is a step-by-step guide to a typical installation.
Many homeowners have already discovered the appeal of Dimplex’s Opti-myst. Featuring a 3D electric flame and smoke effect and available in a range of electric stove, inset and wall-mounted electric fires, It uses unique technology to create the illusion of real ‘smoke’ and ‘flames’.
What some installers do not always realise is that the effect can also be incorporated into bespoke designs, thanks to the Dimplex Opti-myst range of cassette and chassis products. Installers can simply choose the desired model from a choice of four cassettes (flame effect only) and two chassis (flame effect with fan heater) options, and work with their customer to create the perfect end result.
Here, we guide you through the installation of a Dimplex Opti-myst cassette into an original chimney breast which had been closed for at least 25 years – creating the illusion of a stunning open fire in eight simple steps.
1. Check what you’re dealing with
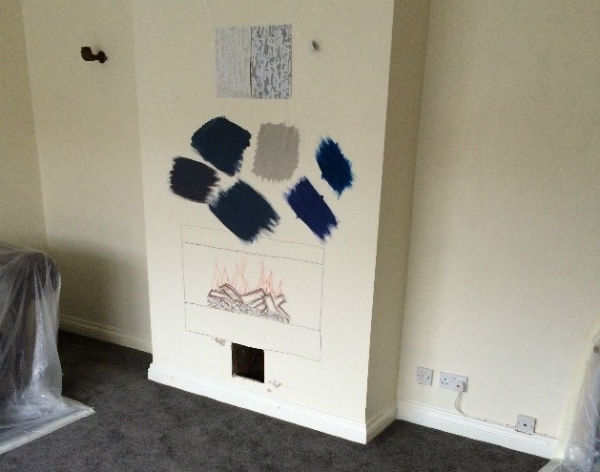
As with any fireplace project, it’s important to establish exactly what you are faced with behind the plaster. In this example, a small hole was cut to establish the width, height and condition of the original opening.
2. Make the opening
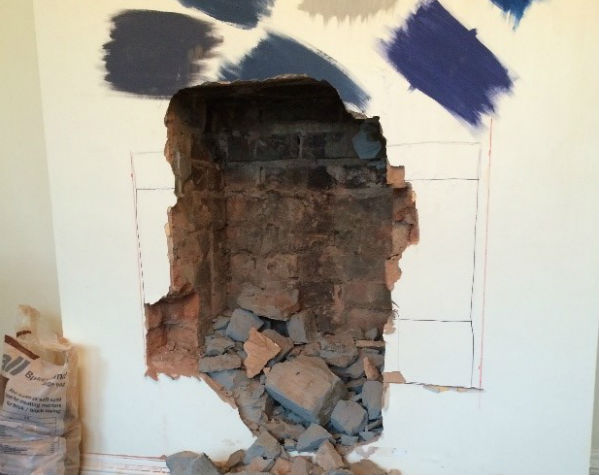
Knock out bricks as required to create the opening, being careful to follow all necessary guidelines to ensure structural integrity. In this example the original fireplace had been filled in with concrete blocks before it was boarded and plastered.
3. Build frame for your Dimplex Opti-myst cassette
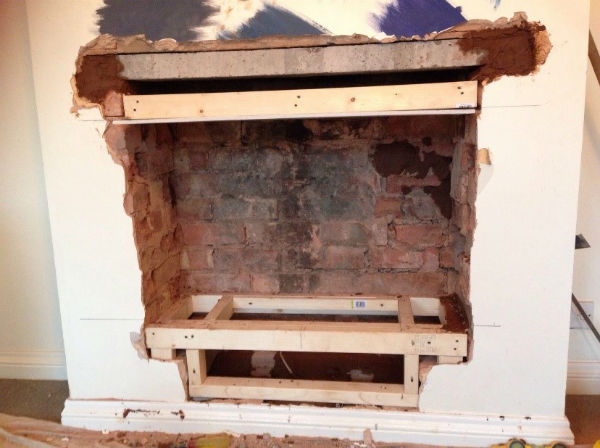
Add a concrete lintel as required and frame the opening. The frame at the top enables a ‘roof’ to the opening and the frame at the bottom has been built specifically to support the cassette so that it sits flush.
4. Board all sides
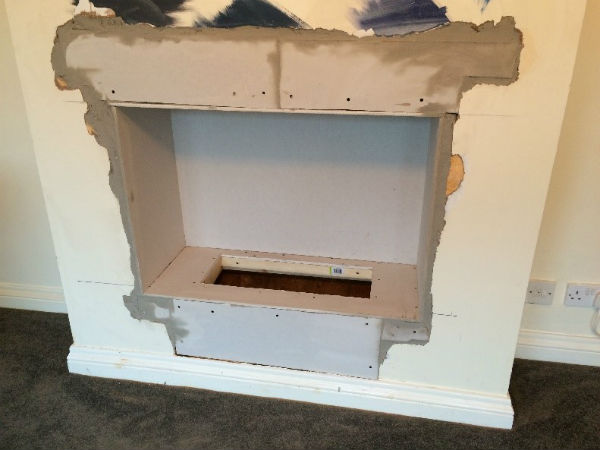
Board all sides ready for skimming, leaving the opening for the cassette. Remember to cater for the electrical connection – the Dimplex Opti-myst cassette comes with a quick-fit IEC (kettle) connection. In this case a hole had already been drilled through the fireplace, allowing the cassette to be connected via to a switched fuse on the right hand side of the chimney breast.
5. Bead and skim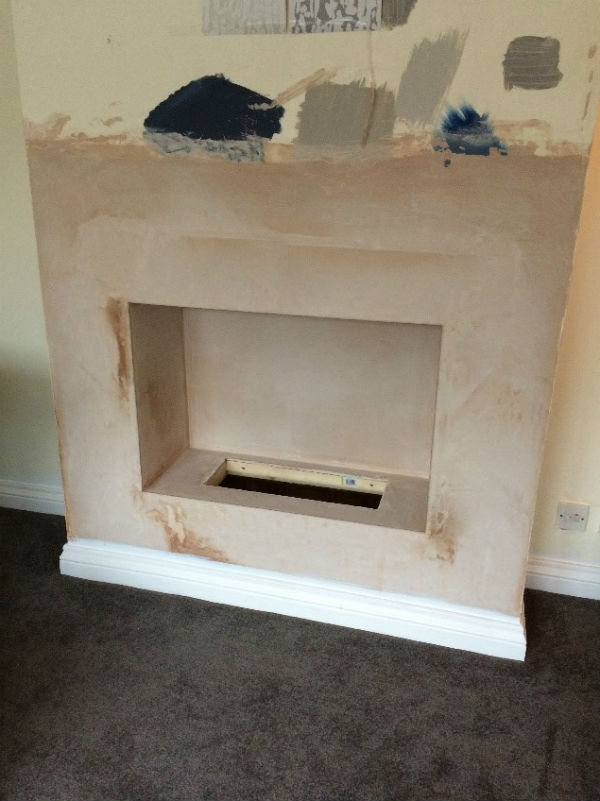
Bead the edges and skim to leave a smooth finish ready for decoration. Reattach skirting if necessary.
6. Create air inlet
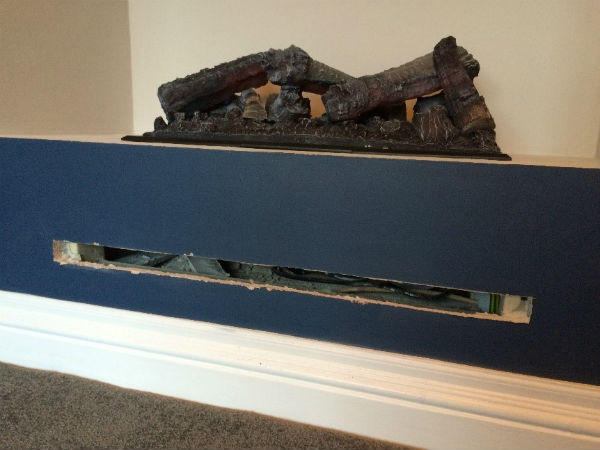
This particular installation features the Opti-myst 600 cassette. The Dimplex Opti-myst 600 cassette requires an air inlet of 100cm2 either below or to the side of the product, to allow air to circulate and enable the flame and smoke effect. This could be done before plastering, of course, but the homeowner preferred to decorate before choosing whether to insert the opening at the front or side of the chimney breast. In this example, the hole was significantly larger to allow for a louvered vent without impacting the required airflow.
7. Insert and connect fire
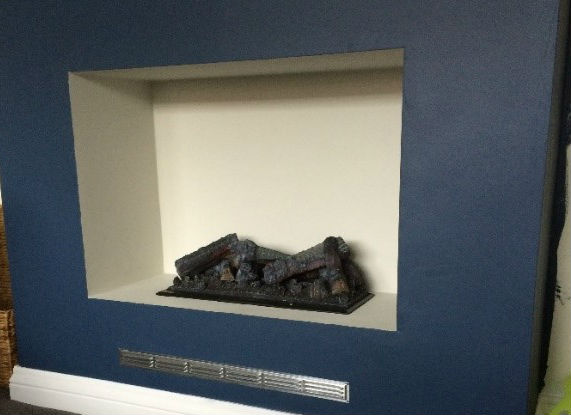
This could not be easier. Simply make the IEC connection and lower the cassette into the opening.
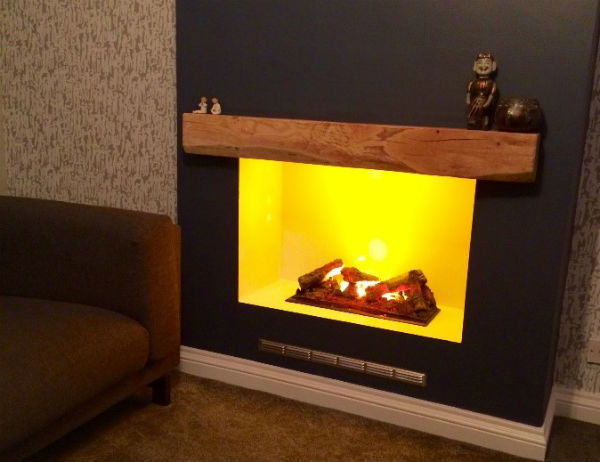
8. Decorate and add finishing touches

Over to the customer to decorate and add finishing touches. Here a beam was added to frame the opening and create a mantelpiece. The Dimplex Opti-myst cassette creates the effect of an open fire all year round, with no fuss, no mess and no heat. There is also no need to consider the safety aspect of real flames, particularly for families with pets or young children.